
Introduced: 2023
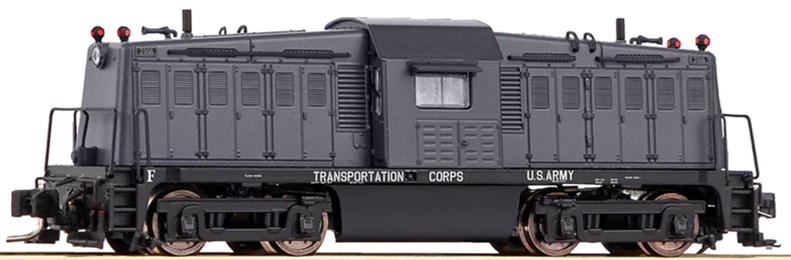
This was the first N scale locomotive to be released by Piko America. They are available with or without DCC-Sound. The first production run consisted of two paint schemes (the above-pictured ATC and ACL versions). Note that both versions come with ala carte sunshade and fuel tank extension details.
The chassis consists of two pieces - a lower cradle and an upper "lid". Walkway tread detailing is molded into the lower chassis. The bell detail and metal handrails attach to the walkway. The motor is a close-sided can (internal specs unknown) with a single large flywheel. Pickup is provided by wired wheel-back wipers. The wires from the wipers transfer current to the main PC board, which is mounted perpendicular to the rear of the chassis (and good luck cleaning those wipers, I have no idea how you'd even get at them). A flexible circuit strip transfers current to LED boards mounted to the front and back of the chassis. Said boards provide directional control for the white headlight and the red backup markers.

The sound decoder (if so equipped) also sits perpendicular to the chassis and attaches to the main PC board via a Next18 interface.

Six of the eight wheels collect current (the remaining two wheels being equipped with traction tires). Only one of the trucks (the one under the motor) has geared axles. The truck gearing is white plastic. I'm not sure what other gearing might lurk up inside the chassis and I'm not brave enough to dissect the thing in order to find out. MTL-style knuckle couplers (proprietary to Piko) mount to the chassis.

For sound-equipped models, the speaker mounts inside the metal fuel tank. Sticky-uppy contacts on the speaker rub against metal contact strips that are attached to a small circuit board on the bottom of the chassis. Wires from the main PC board transfer current to said small circuit board.

The shell is metal with a plastic cab detail piece wrapped around the outside. The shell is finely detailed with numerous press-fit parts.

This is a terrific looking model that sounds really cool, but unfortunately it does have some performance issues. Yes, when it's running it runs smoothly and quietly and can pull a ton (20+ assorted 40' freight cars on level track). But stopping, changing directions, and then restarting will occasionally lead to a stall (even with the wheels and track freshly cleaned). And even when it's not out-and-stalling, it still has occasional problems with the sound cutting in and out. And no, that's not good behavior for a switcher. My guess is that most (or all) of the blame can be laid at the feet of the traction tires eating up 25% of the pickup footprint. And why Piko thought they were needed is beyond me. It's not like this thing needs to pull 100 cars! In any case, it's just too bad they didn't include a non-TT wheelset in the package. But as is, I can't really recommend it as an operations-worthy loco.
Prototype Info -
The Whitcomb 65-Ton Diesel loco (also known as the 65-DE-19A) is a unique and detailed loco that actually helped win WWII. The Whitcomb 65-Ton Diesel Locos were built in America to fit the tight clearances of European railroads. After the US Army Transportation Corps was done with them, some even returned to serve on railroads and industrial short lines all across America.
Model Features -
- 0.56mm deep fine wheel flanges conforming to NMRA S-4.2 for operation on N-Scale track with rails down to Code 40
- Sound versions include NMRA/DCC-compliant PIKO Sound Decoder
- Sound versions offer lights and basic automatic motor sounds when operated in Analog/DC mode
- Diecast metal chassis and hood for heavy weight and excellent pulling power
- Metal handrails
- Powerful, quiet, smooth-running motor for great low-speeds and precise running
- Numerous factory-applied details
- Crisp and clean lettering and logo designs
- Minimum recommended radius: 7.55" / 192mm
- American Whitcomb versions come with fully-enclosed end beams and body-mounted MTL-compatible PIKO knuckle couplers
Shell Removal -
To remove the shell, first remove the two screws that hold the fuel tank to the chassis. Once the fuel tank is out of the way you will see the two screws that hold the shell to the chassis. Remove those and the shell should slide up and off quite readily.
Grade: C