

Introduced: 1984
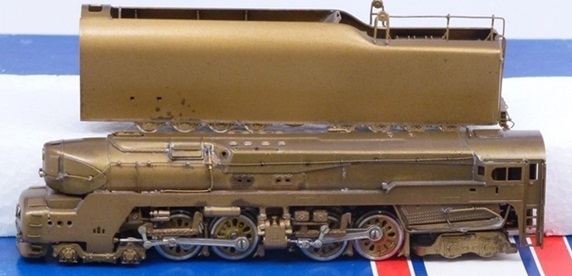
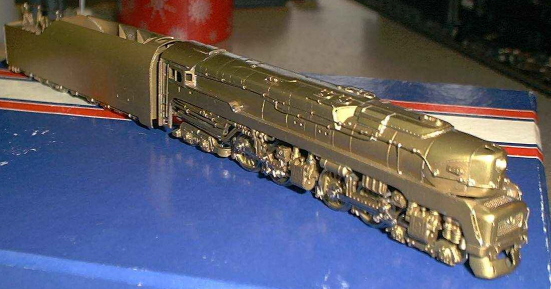
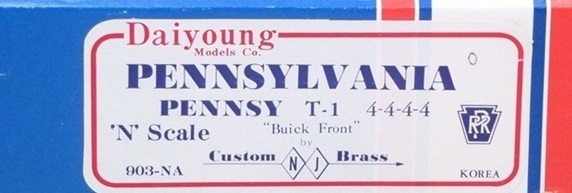
As pictured above, there are two different versions of this model - the as-built "Buick Front" version and the later "Standard" version. Both versions are extremely rare, with perhaps as few as 50 of each (skirted / de-skirted) having been made. They rarely show up on eBay, and the ones that do generally go for premium prices ($1000 or more). Unfortunately, apart from sitting on a shelf and looking pretty, they're basically useless as operating models (but more on that in a moment).
The two-piece chassis is articulated (unlike the prototype) and the mechanism actually employs two separate Sagami can motors (one for each engine). The internal specs of the motors are a mystery to me, but supposition is that they are 3-pole / straight-wound. Each motorshaft is equipped with a large brass worm (and with the rear worm/shaft being much longer than the forward one). One axle per engine is geared (the gearing being a combination of nylon and brass). The outer driversets are turned solely by the siderods. The pilot truck and tender trucks are sprung (the trailing truck is not).
The driver axles seat inside of brass bearing blocks mounted inside of cutouts in the engine frames. The locomotive wheels (drivers, pilot truck and trailing truck) collect right rail current, whereas the tender wheels provide pickup from the left rail. Right rail current flows through the entire chassis and reaches the motors via a couple of wires. Left rail current is transferred from the tender to the engine by way of a spring wire on the drawbar (and then to the two motors via a couple of wires attached to the back of the chassis). There are no traction tires. The tender drawbar has two holes - one suitable for broad curves and one for sharper curves. All wheels are low-profile, so no problems on Atlas Code 55 track. There is no lighting.
I tested one of the Buick Front (skirted) versions and found the minimum radius for curves to be right around 19" (any sharper than that and the pilot truck is derailing, which is a bit of a disappointment given the articulated design). Conversely, I've heard from others that the Standard version can handle curves as sharp as 9.75"-radius (evidently the skirting around the pilot truck on the Buick Front version limits how far it can pivot).

As delivered, these models have a plethora of problems (or potential problems). So, if you're planning on shelling out the requisite $1000+ for one, you'd better be an experienced locomotive tinkerer (or have access to one, or hope that some previous owner was one). Otherwise, chances are that you will wind up with a locomotive that doesn't run at all. That was certainly my experience, but fortunately I have ready access to Ron Bearden (noted N scale locomotive fixer) who took care of most of its issues for me -
- The screw on the underside of the trailing truck is too long and, as such, is prone to touching the drawbar and causing a short. Filing the end of said screw a little shorter and then insulating it solves this problem.
- The tender truck braces (to which the truck sideframes are screwed) are either improperly designed or poorly manufactured (or both), and the end result is that the insulated wheels can wind up touching them (IE dead short). Ron fixed this by filing some material off of the braces (around the wheels) in order to provide the necessary breathing room.
- Some have reported that the the tender trucks sit too close to the tender undercarriage (thus resulting in short-circuits on anything but perfectly flat track). Mine evidently didn't exhibit this particular problem, but I'm told that the proposed solution would be to shim the trucks with some thin washers.
- The front tender truck sideframes, tender truck screws, and the screws in the base of the tender all conflict and bump each other. Not a short-circuit situation, but it's definitely an obstruction. So, yet another reason to put washers between the truck bolsters and the trucks.
- One of the brake brackets was touching one of the insulated drivers. I'm not sure if this was a manufacturing error or simply the result of some fumble-fingered modeler somewhere between 1984 and now. But in any case, something else to watch out for.
- The spring wire connection on the drawbar can be problematic (resulting in the loco stuttering and stalling as the tender current comes and goes). The solution to this problem is to run an insulated mini-wire from the tender to the locomotive (mine did not require this, but it's a good idea in general). Taking things a step further, one could also add an additional wire to the forward motor (either connected to the frame or to the rear motor) to share right rail current (Ron did do this).
- The dual-motor setup is very poorly designed. My particular example didn't exhibit any serious problems in this regard, but I'm told by others that they can be virtually unrunnable if the motors aren't perfectly speed-matched. IE, one engine's drivers wind up turning faster than the other's - slipping and sliding on the rails and making all sorts of unpleasant noises. Unfortunately, apart from replacing the motors (or decoderizing them), there isn't any simple solution to this problem.
- The mesh between the worms and the worm gears may require some adjustment (as mine did). The gears on my example were too tight, thus resulting in a bit of binding.
- As noted above, the pilot truck is extremely finicky. This can no doubt be traced to the extremely flimsy spring they used to provide downward pressure on the wheels. Not only does mine derail on anything but the broadest of curves (19" or more), it will derail on any kind of curve if it's running too fast. Fortunately, I was able to solve this problem by simply replacing said flimsy spring with a more robust one.
- That giant yellow (or in some cases red) wire is a very poorly conceived kludge. It is very stiff by necessity (otherwise it would get fouled up with the worms). Unfortunately, this stiffness makes assembly quite difficult (if the wire isn't bent "just so", it can interfere with the ride of the forward drivers). The orientation of the motors is also a bit of a gaffe. The insulated poles sit perilously close to the bottom of the boiler (where they would short out if they touched it). Ron rotated the motors on mine in order to place the insulated poles farther away from the boiler shell.

There were a number of other problems that Ron fixed that I won't go into here (not knowing if they were design problems, manufacturing problems, old age problems, or simply the result of modeler ineptitude). In any case, it does run acceptably well now. Pickup and current conductivity are solid, throttle response is smooth, and it can reliably pull a decent number of cars around in circles without stuttering or stalling (the limit seems to be right around ten 85' streamliners). On the downside, those cheap motors make a lot of noise, slow speed creep isn't particularly impressive (definitely not "one tie at a time"), the top-end speed is overly high, and the whole thing seems just a bit wobbly and unstable as it rolls along. So, no, not super impressive (and that's after Ron worked all his magic). Ultimately, I don't see non-collectors wanting to waste their time on one of these (not unless they have a lot of time to waste that is).


Shell Removal -
To remove the two engines (and their motors), first remove the two screws under the cab. Next, remove the screw that connects the two engines together. Next, remove the long screw (w/ spring and brass washer) from underneath the pilot. Next, remove the long screw that holds the rear engine to the shell. Lastly, remove the screw at the rear that holds the yellow wire to the drawbar bracket.
To remove the tender shell, first remove the coupler (if present). Next, remove the two screws that hold the rear deck. Next, remove the screws and springs from both trucks. Lastly, remove the six tiny screws from the chassis and the tender shell is ready to come off. It may be necessary to use a small/flat jeweler's screwdriver to slowly pry up the chassis from front to back. Make sure to get the insulated wheels on the correct side (right) when reassembling.
Grade: F (as delivered, but maybe a C+ or B- if all the problems are addressed)