| FP7 | FP9 |
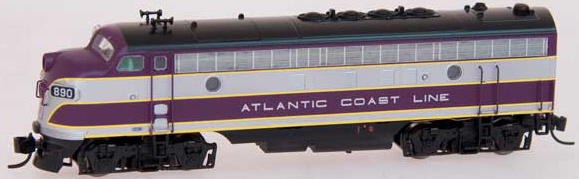 | 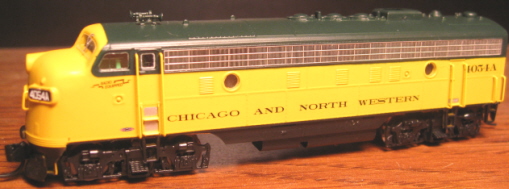 |
| FP7 | FP9 |
| |
Introduced: 2008 (FP7), 2010 (FP9), and 2014 (revised FP7 and FP9)
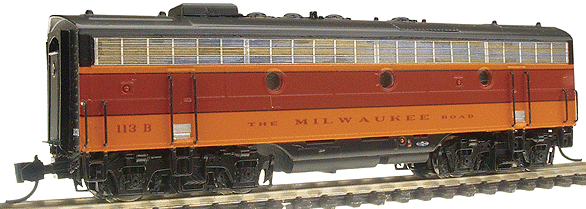
Apart from some minor differences in shell detailing, these models are basically identical. So, I'm going to cover them both here to save a bit of time. Intermountain also sells accompanying B units (which can serve as either F7B's or F9B's), although those are covered elsewhere in this encyclopedia -
Like the rest of Intermountain's impressive line of EMD "F" units, these FP's are gorgeous models that run flawlessly - absolutely dead quiet and silky smooth, tremendous slow speed creep, perfect pickup, pulling power to spare, etc, etc. One new feature I've noticed on these is the separately applied windshield wipers. Very cool!
The FP7 and FP9 models, although mechanically similar to all the rest of Intermountain's EMD "F" models, do have a significantly longer chassis than any of the rest of them (ala the prototype). I'm told that the shells are designed, cut and molded in the USA. They are then finished and drives put under them in China.
As far as I can tell, the only external differences between these two models are that the FP9's forward porthole is a little farther back than the forward porthole on the FP7, and the FP9 has a fifth set of vent louvers (located immediately ahead of said forward porthole).
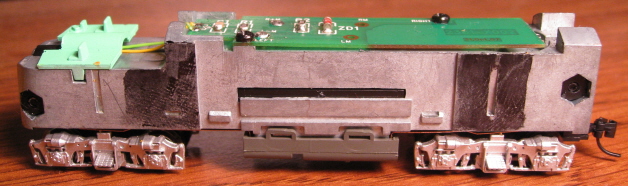
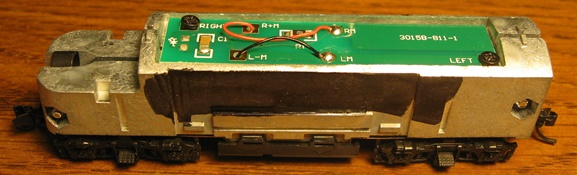
These locos sport all of the niceties one normally associates with "modern" diesel models, EG - split-frame DCC-Ready metal chassis, dual-flywheels, low-friction drive, plastic truck assemblies, plastic gearing, blackened wheels, all-wheel drive / pick-up (no traction tires). The motor is an open-sided 5-poler. Wheels are low-profile and have no problems on Code-55 track. Couplers are chassis-mounted Accumates. Directional lighting is controlled by a PC board mounted on top of the chassis, and with the LED headlight mounted on the front of the chassis (with wires running between the two). The headlights are white and very bright.
One minor complaint I have with these models is the fact that the headlight on the "A" units is not part of the PC board (rather, it sits about an inch away from said board and is connected via a couple of wires). No big deal if you're operating these in DC mode, but it does make decoder installation a bit more complicated than it could/should be (basically involving desoldering the light wires from the stock PC board and then resoldering them to the decoder board).
Prior to the 2014 production run, these locomotives accepted a "drop in" style decoder. In this scheme, the motor brushcaps had lengthy metal tabs that legs on the PC board (or decoder) would contact in order to transfer current to the motor -
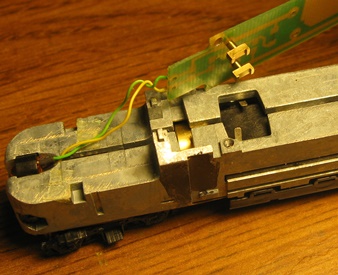
Unfortunately, as of 2014 the legs and brushcap tabs were removed. Instead, what we have are wires soldered directly to the brushcaps (and then running up to the PC board) -
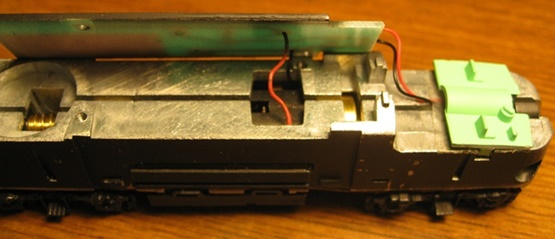
Identifying the newer (and less DCC-Ready) version is easy. If you see wires on top of the PC board, you have the newer version -
Only Intermountain knows why they decided to take this giant step backwards DCC-wise. But whatever the reason, decoder installation is now going to require even more soldering (desoldering the motor wires from the PC board and then resoldering them to contacts on the decoder board). Digitrax's DN166I1D decoder is designed for these new models.
Note - Occasionally one will encounter an Intermountain F unit that makes a lot of noise when running. Ron Bearden (noted locomotive guru) has diagnosed the problem as being too much space between the "spiked donuts" in the drivetrain (one donut mounts to the wormshaft, one mounts inside the flywheel, and then a slotted cylindar connects the two).
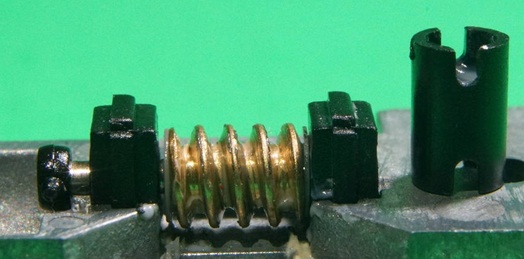
The noise problems arise when the donuts are mounted too far apart from each other (thus allowing the connecting cylindar to rattle around as the driveshaft spins). And the simple solution is to close the distance between the two donuts by sliding the wormshaft donut further out on its shaft (IE, towards the flywheel).
| Stock Donut | Relocated Donut |
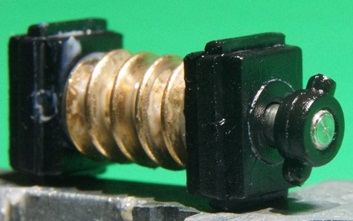 |  |
When moving the wormshaft donut, be sure to move it such that most (but not all) of the slack between it and the connecting cylindar is removed. Without a tiny tiny amount of wiggle room between the various parts, a slight bind will be placed on the drive train and the noise will be back.
Removing the shell on these is pretty simple (once you know the correct way to go about it - otherwise, they can be a bit of a bitch). Start by inserting two toothpicks, one on either side of the fuel tank. Then, slide the front end of the shell up and off first (if you try sliding the back end up first, the whole thing will seize up and refuse to move). Note - you'll need to remove the front coupler first (just unscrew the screw and slide the coupler out the front).
One note of caution when putting the shell back on - there are little plastic ridges inside the shell that slide along grooves in the chassis. These prevent the shell from going on "too far", and if you try to force the issue you will snap off the rear coupler mount (don't ask me how I know this).
Grade: A